Koi pond building is an exciting and rewarding project that can transform your backyard into a tranquil oasis. A well-constructed koi pond provides a serene environment for these beautiful fish and can be a lasting focal point in your garden. However, building a koi pond is not simply about digging a hole and adding water; it requires careful planning, the right equipment, and attention to the health and wellbeing of the koi. In this comprehensive guide, we’ll walk you through the essential steps of koi pond building, from initial planning to introducing your first koi.
Planning Your Koi Pond: The Foundation of a Healthy Ecosystem
The planning phase is the most crucial step in koi pond building. Rushing through this stage can lead to numerous issues later on, such as poor water quality, inadequate space for your koi, or inefficient filtration systems.
Location, Location, Location
Choosing the perfect spot for your koi pond is critical to both its aesthetic appeal and functionality.
- Sunlight and Shade: Select a location that receives 4 to 6 hours of sunlight each day, with morning sunlight and afternoon shade being the ideal combination. This balance will help promote healthy plant growth while preventing water overheating, which could stress the koi and lead to algae problems.
- Avoid Trees: Keep the pond at least 15 to 20 feet away from large deciduous trees. Falling leaves and debris can clog filters and degrade water quality.
- Accessibility and Runoff: Your pond should be easily accessible for feeding, maintenance, and viewing. Make sure it is placed on a high point or has proper grading so that stormwater runoff flows away from the pond, preventing contaminants like fertilizers and pesticides from entering the water.
Sizing the Pond for Koi
Koi can grow to impressive sizes and live for many years, so it’s essential to plan for their adult size and the space they’ll need.
- Depth: Depth is the most important dimension in koi pond building. A minimum depth of 3 feet is necessary, but 4 to 6 feet is ideal, particularly if you live in a region with cold winters. Deeper water helps koi safely overwinter below the ice line and provides them with a cool refuge during hot summers.
- Volume: Plan for at least 250 to 500 gallons of water per adult koi. A small pond might start at 1,000 gallons, measuring about 6 feet by 8 feet with a 3-foot depth, but larger ponds will be necessary as your koi grow.
- Shape: Opt for irregular or kidney-shaped ponds as they not only look more natural but also promote better water circulation than rigid, rectangular ponds. Incorporate shelves around the perimeter (10-14 inches deep) for planting aquatic plants.
See also: 5 Reasons North Port Homeowners Should Consider Autonomous Drone Roof Inspections
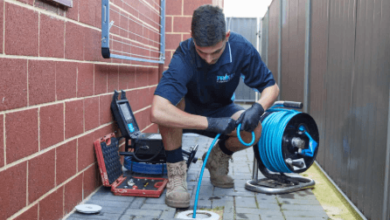
Gathering the Right Equipment for Koi Pond Building
Quality materials and equipment are crucial to ensure the longevity and health of your koi pond.
Pond Liner and Underlayment
A durable, fish-safe liner, such as 45-mil EPDM rubber, is essential for koi pond building. Protect the liner from punctures using a geotextile underlayment, which will help prevent damage from sharp rocks and roots.
Filtration System
A robust filtration system is a must for keeping water clean and healthy for koi.
- Mechanical Filtration: A skimmer and bottom drain are essential for removing solid debris such as leaves and fish waste from the water.
- Biological Filtration: This type of filtration is necessary to break down toxic substances like ammonia and nitrites from fish waste, converting them into less harmful nitrates, which are then absorbed by plants.
Circulation and Aeration
- Pump: A pump should circulate the entire pond’s water volume at least once per hour. External pumps are often more efficient and easier to maintain.
- Aeration: Proper water movement is essential for oxygenation. Consider adding a waterfall, fountain, or air pump with air stones to keep oxygen levels high and water moving.
Other Essentials
In addition to the liner, pump, and filtration system, you’ll also need PVC tubing, a water test kit for checking parameters like pH, ammonia, nitrites, and nitrates, smooth river stones or gravel, and a water dechlorinator.
Step-by-Step Guide to Koi Pond Building
With your plan and materials in hand, it’s time to get started on your koi pond building project.
1. Mark and Excavate
Use a garden hose or spray paint to outline your pond’s shape on the ground. Make sure to call your local utility locator service before you begin digging. Start by excavating shallow shelves, gradually working down to the deepest point of the pond. Ensure the side walls are gently sloped (about 45-60 degrees) to prevent collapse.
2. Install Plumbing and Underlayment
Before laying the liner, install any necessary plumbing for features like a bottom drain and skimmer. Line the entire hole with underlayment to protect the liner from punctures. Overlap the seams of the underlayment to create a strong, protective layer.
3. Lay the Liner
Gently place the pond liner, smoothing it into the contours of the excavation. Ensure the liner extends at least 12-18 inches beyond the pond’s edge. Secure the edges temporarily with smooth stones or pavers until you are ready to finalize the setup.
4. Set Up Equipment
Install the skimmer, pump, and filtration system according to the manufacturer’s instructions. Position the skimmer opposite the waterfall or water return to maximize surface debris collection and circulation. Use stacked, rounded stones to create the waterfall structure and conceal the liner.
5. Add Rocks and Gravel (Optional)
For a more natural look, you can add smooth river rocks and gravel to the pond bottom. While some koi pond owners prefer a bare liner for easy cleaning, others prefer the aesthetic appeal and added surface area for beneficial bacteria that rocks provide. Ensure all stones are smooth to avoid injury to your koi.
6. Fill the Pond and Condition the Water
Fill the pond slowly with water, making sure to remove any large wrinkles from the liner as it settles. Immediately add a high-quality water dechlorinator to neutralize chlorine and chloramines in tap water.
7. Cycle the Pond and Add Plants
Before adding koi, the pond needs to go through the nitrogen cycle to establish beneficial bacteria in the filter and substrate. Run the filtration system continuously for 7 to 10 days (or longer) and test the water regularly for ammonia, nitrites, and nitrates.
During this period, introduce aquatic plants. These plants help oxygenate the water and compete with algae for nutrients. Popular choices for koi ponds include water lilies, hornwort, and irises.
8. Introduce Your Koi
Once the water tests show zero ammonia and nitrites, it’s time to add your koi. Begin by introducing a small number of koi to avoid overwhelming the new pond ecosystem. Acclimate them to the water temperature by floating their transport bag in the pond for 15-30 minutes and gradually mixing pond water into the bag before releasing them.
Koi pond building is a significant undertaking, but the reward is a beautiful, thriving ecosystem that provides years of enjoyment. By following these steps and ensuring the pond’s design supports the health of your koi, you can create a peaceful and sustainable aquatic environment.
Frequently Asked Questions
1. How deep should a koi pond be?
A koi pond should be at least 3 feet deep, but 4 to 6 feet is ideal, particularly in colder climates where the koi need to overwinter.
2. How do I control algae growth in a koi pond?
To control algae, ensure proper filtration and circulation. Adding plants can also help compete with algae for nutrients, and installing a UV filter can help reduce algae blooms.
3. How many koi can I keep in my pond?
A good rule is 250-500 gallons of water per adult koi. The more space you have, the healthier your koi will be, and the better the pond will be at maintaining water quality.
4. Do I need a filtration system for my koi pond?
Yes, a high-quality filtration system is essential to maintain water quality and ensure a healthy environment for your koi. Both mechanical and biological filtration are necessary.
5. How long does it take to cycle a koi pond?
Cycling a koi pond typically takes 2 to 4 weeks. During this time, beneficial bacteria are establishing themselves in the filter and substrate to help maintain water quality.